The Problem
After wrist pain, back pain, and trouble concentrating, I decided it was time for a change in my work setup. A stand-up desk seemed to be the right solution, and I found a way to build one without investing too much time and money. After using this setup for the past year and a half, I've found that it's been an improvement in many ways. I don't need to rewrite the history of standup desks because they already have. Some schools are installing standup desks for their students. This is a guide for building your own desk using standard Ikea parts. If you already have an Ikea tabletop, you might only need the legs (as was my case).
Time & Tools
 Tools needed: just a Phillips screwdriver and the supplied hex keys
 Time needed: approx 30 minutes for assembly
Parts List
-
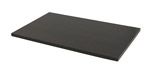 1 x Ikea VIKA tabletop ($ varies, choose your size/color)
Example: VIKA TabletopsYou could use whatever tabletop you already have as long as the legs are removable.
1 x Ikea VIKA tabletop ($ varies, choose your size/color)
Example: VIKA TabletopsYou could use whatever tabletop you already have as long as the legs are removable. -
 4 x Ikea VIKA Kaj adjustable table legs ($15/each)
Ikea link: VIKA KajAwesomely adjustable and stable. These will go almost a foot higher than stated in the description.
4 x Ikea VIKA Kaj adjustable table legs ($15/each)
Ikea link: VIKA KajAwesomely adjustable and stable. These will go almost a foot higher than stated in the description. -
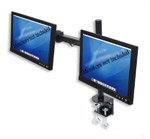 (optional) 1 x Dual monitor adjustable stand (~$50)
Example: Sturdy dual-monitor standThese are solid and nicely adjustable and super cheap! Since I have a seemingly paper-mache tabletop, I used a piece of 1" thick pine underneath in the spot where this clamped to the table. No problems or issues have arisen yet.
(optional) 1 x Dual monitor adjustable stand (~$50)
Example: Sturdy dual-monitor standThese are solid and nicely adjustable and super cheap! Since I have a seemingly paper-mache tabletop, I used a piece of 1" thick pine underneath in the spot where this clamped to the table. No problems or issues have arisen yet. -
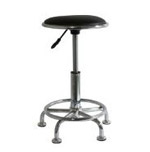 (optional) 1 x Cheap, height adjustable, semi-uncomfortable stool (~$80)
Example: A tall shop stoolThe semi-uncomfortable nature of the stool forces me to not sit for long and change positions often. Make sure you get a stool that's tall enough that you don't have to change the monitor height between sitting/standing positions. You might also want a footrest at the correct height.
(optional) 1 x Cheap, height adjustable, semi-uncomfortable stool (~$80)
Example: A tall shop stoolThe semi-uncomfortable nature of the stool forces me to not sit for long and change positions often. Make sure you get a stool that's tall enough that you don't have to change the monitor height between sitting/standing positions. You might also want a footrest at the correct height.
Step-by-step Solution
-
Step 1
Measure the approximate table height you'll need. Here's a guide to estimating a good height for your desk.
-
Step 2
Gather the parts and assemble the table. Attach the legs as instructed by IKEA and then adjust their height as measured in step 1. Try it out with a keyboard before you start putting all of your things on the table. Make sure the keyboard is at a comfortable height.
-
Step 3
Install the monitor stand. I used a piece of wood between the monitor stand and tabletop to spread out the monitors' weight over a larger area. If you have a solid wood tabletop you may not need to do this. Adjust the monitors to a comfortable height.
-
Step 4
Enjoy your new table! Take it easy at first so you don't get sore feet, but you'll notice that it gets easier after a week or two. Change positions often and take a rest or walk around when needed. It's all about changing positions frequently. You're now in the good company of Charles Dickens, Ernest Hemingway, Thomas Jefferson, and many more.